Redirecting visitors to a 403 forbidden page when accessing the Wordpress admin page
Written: 2019-08-16
Tags
Category

So after my last post I woke up to around 40+ and counting notifications on IP's that fail2ban had banned over the night. They were all failed attempts to get past the basic auth prompt I have on my Wordpress admin page. So with the last post fresh in my mind I knew it was possible to have a Cloudflare worker load a different page for visitors based on their IP.
This was my fail2ban channel on discord. If you want these kind of notifications check out my fail2ban post!
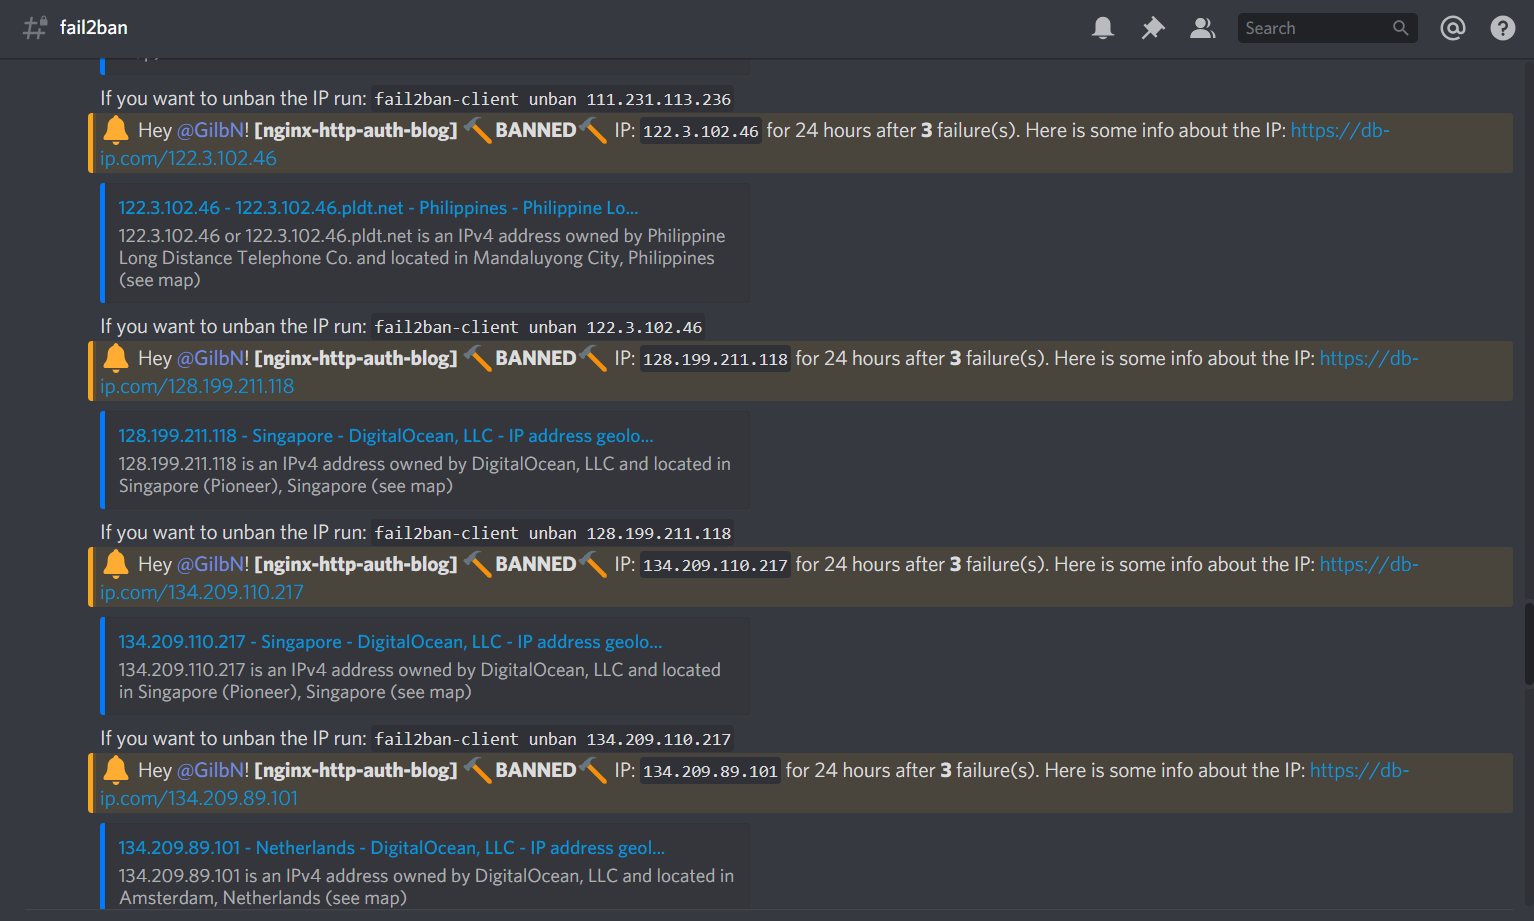
So using the same resource as in the first Cloudflare worker post we can easily route visitors to a custom 403 Forbidden page. Now they can't even try to get passed the basic auth! Have a look here: https://technicalramblings.com/wp-admin
Note
If you have a dynamic ip that often changes, this might not be the best solution for you!
Creating a worker
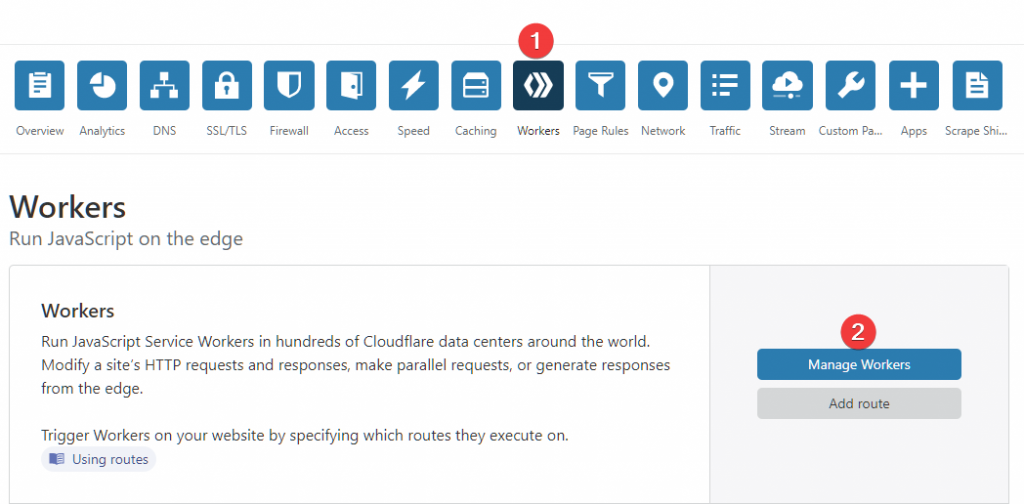
On your Cloudflare dashboard click on Workers and go through the first time setup if you haven't done that yet. Next click on Manage Workers and Create a Worker
Paste the script below.
addEventListener("fetch", event => {
  event.respondWith(fetchAndReplace(event.request));
});

async function fetchAndReplace(request) {
  let modifiedHeaders = new Headers();

  modifiedHeaders.set('Content-Type', 'text/html');
  modifiedHeaders.append('Pragma', 'no-cache');

//Return 403 page if you're not calling from a trusted IP
const white_list = [
'1.1.1.1',
'2.2.2.2'
];
if (white_list.indexOf(request.headers.get("cf-connecting-ip")) > -1)
//Fire all other requests directly to your WebServer
return fetch(request);

 else {
// Return modified response.
return new Response(forbiddenPage, {
headers: modifiedHeaders
});
}
}

let forbiddenPage = `

<!DOCTYPE html>
<title>nope...</title>
<style>
@import url('https://fonts.googleapis.com/css?family=Press+Start+2P');

html,body{
   width: 100%;
   height: 100%;
   margin: 0;
}

*{
   font-family: 'Press Start 2P', cursive;
   box-sizing: border-box;
}
#app{
   padding: 1rem;
   background: black;
   display: flex;
   height: 100%;
   justify-content: center;
   align-items: center;
   color: #54FE55;
   text-shadow: 0px 0px 10px ;
   font-size: 6rem;
   flex-direction: column;
   .txt {
      font-size: 1.8rem;
   }
}
@keyframes blink {
    0%   {opacity: 0}
    49%  {opacity: 0}
    50%  {opacity: 1}
    100% {opacity: 1}
}

.blink {
   animation-name: blink;
    animation-duration: 1s;
   animation-iteration-count: infinite;
}
</style>
<body>
<div id="app">
   <div>403</div>
   <div class="txt">
      Forbidden<span class="blink">_</span>
   </div>
</div>
</body>

`;
Add your whitelisted IP's in this section:
//Return 403 page if you're not calling from a trusted IP
const white_list = [
'1.2.3.4',
'5.6.7.8'
];
Save and deploy the worker.
Go back to the main worker page and add your routes. The two routes I use are domain.com/wp-login* and domain.com/wp-admin*

The page should now look like this when accessing from another IP than the white listed ones.
Neat right!
If you want a different page showing it's as simple as replacing the html. I just googled 403 forbidden template and found the one above on codepen.
If you need any extra help join the Discord server
Source:
https://codepen.io/lsgrrd/pen/BObbYY https://www.resdevops.com/2018/03/20/cloudflare-workers-maintenance-mode-static-page/